Showing posts with label Silhouette Cameo. Show all posts

Monday, August 11, 2014

What Does the Fox Say?

Hello!

This song has probably been sung WAY too much, but my son still loves it and it frequently makes an appearance on his playlist.  I probably should tell you he just turned 18.  He's a crazy, fun guy who loves life and lives it to the fullest.  Whenever he sees a fox he says "I wish I could just have a fox for a pet!" ha ha ha.  Since that isn't going to ever happen, I thought I'd give him an attempt at a fox for a pet with this birthday card:


I love, love, love my Silhouette and how I can use it to completely customize my projects.  This fox is #58218 by Jillibean Soup in the Silhouette store.

I decided to pop up the top layer and place a card stock piece I embossed with a star stamp and clear embossing powder behind.  Here's a closer look:


Happily, he thought this was a great card!

Thanks for joining me at the Table today!


Thursday, July 3, 2014

Paper Crafts and Scrapbooking magazine

Hello!

Just wanted to share a little peek into the August issue of Paper Crafts and Scrapbooking magazine.  I was excited when I got the email that they wanted to pick up my card and it's even more exciting to see it in print!  You know they work on these magazine issues months in advance, don't you?  Well they do.  And if you think it's easy to wait and wait and wait and wait and... for your project to be published, it's not.  At least not for a newbie like me!  I think I got the acceptance email way back in March so waiting clear....till....August.... to see it sure seems like a looooong time to wait.  But at last it's here.

I started collecting the hard copies of the publications I am in (which really, who am I kidding.  It's not many) a year or so ago but now that PC&S is only digital, I'll just pray and keep my fingers and toes crossed that nothing happens to my iPad!  Yeah I know.  I can save it to my desktop computer, but I highly doubt that I'll cuddle up in bed with my big computer any time soon.  Does anyone else have a love/hate relationship with digital books and magazines?  I mean really.  Who doesn't love that you can store hundreds of books and magazines on a slim device, meaning less bookcases to find room for but how can you not love to thumb through an actual paper magazine or book?  See the pretty spine on your shelf and smell the paper?...ah well.  Such is the way of technology, right?

Anyway, my card is right there on the right.  The one right there with the feathers and stitching.  I'm in the section of the magazine that you take a sketch they provide and you make something based off of the sketch (as I'm sure you can tell by the similar layout of the awesome card by Miriam next to mine. ha!)


So in love with how this turned out (on the first try, I might add) and so happy that PC&S liked it too!

Thanks for joining me at the Table today.


Monday, April 28, 2014

We R Memory Keepers National Scrapbooking Day Blog Hop!

Hello!

Welcome to my little stop on the We R Memory Keepers blog hop!  You should have come from Pam Bray's gorgeous blog.

We wanted to get you excited for National Scrapbooking Day which is this Saturday, May 1st!  How will you celebrate?

For my project today, I'm actually setting aside my photos and journaling pen to make a little home decor piece.  But it's for my scrapbook room, so that still counts, right?

I recently acquired a room of my own for my crafting {yay!} and I'm slowly purging older supplies, organizing the supplies I love, and decorating to make this room a place of inspiration just for me.

When We R came out with their stitching templates, I was so excited!  I love the look of embroidered samplers.  I decided to combine embroidery with my Silhouette to make this:


I first started with a piece of white textured card stock that I cut to 8 x 10.  I used a light pencil line to trace around the frame opening, then took my ruler and drew light lines vertically and horizontally to find the center for my phrase.  Then I went to town piercing and stitching.  Did you know We R Memory Keepers has floss in a ton of colors and textures?  I may or may not have a whole drawer full of We R floss and twine. ;D


I love how easy it was to combine words from the template to make a custom work of art!


I really like the word 'lovely' so 'lovely moments, lovely life" seemed like the perfect sentiment to add to my craft room.  Could it be all those British period dramas I'm addicted to? Maybe.... But in any case, it also reminds me to keep looking for those lovely moments that I sometimes overlook in life.

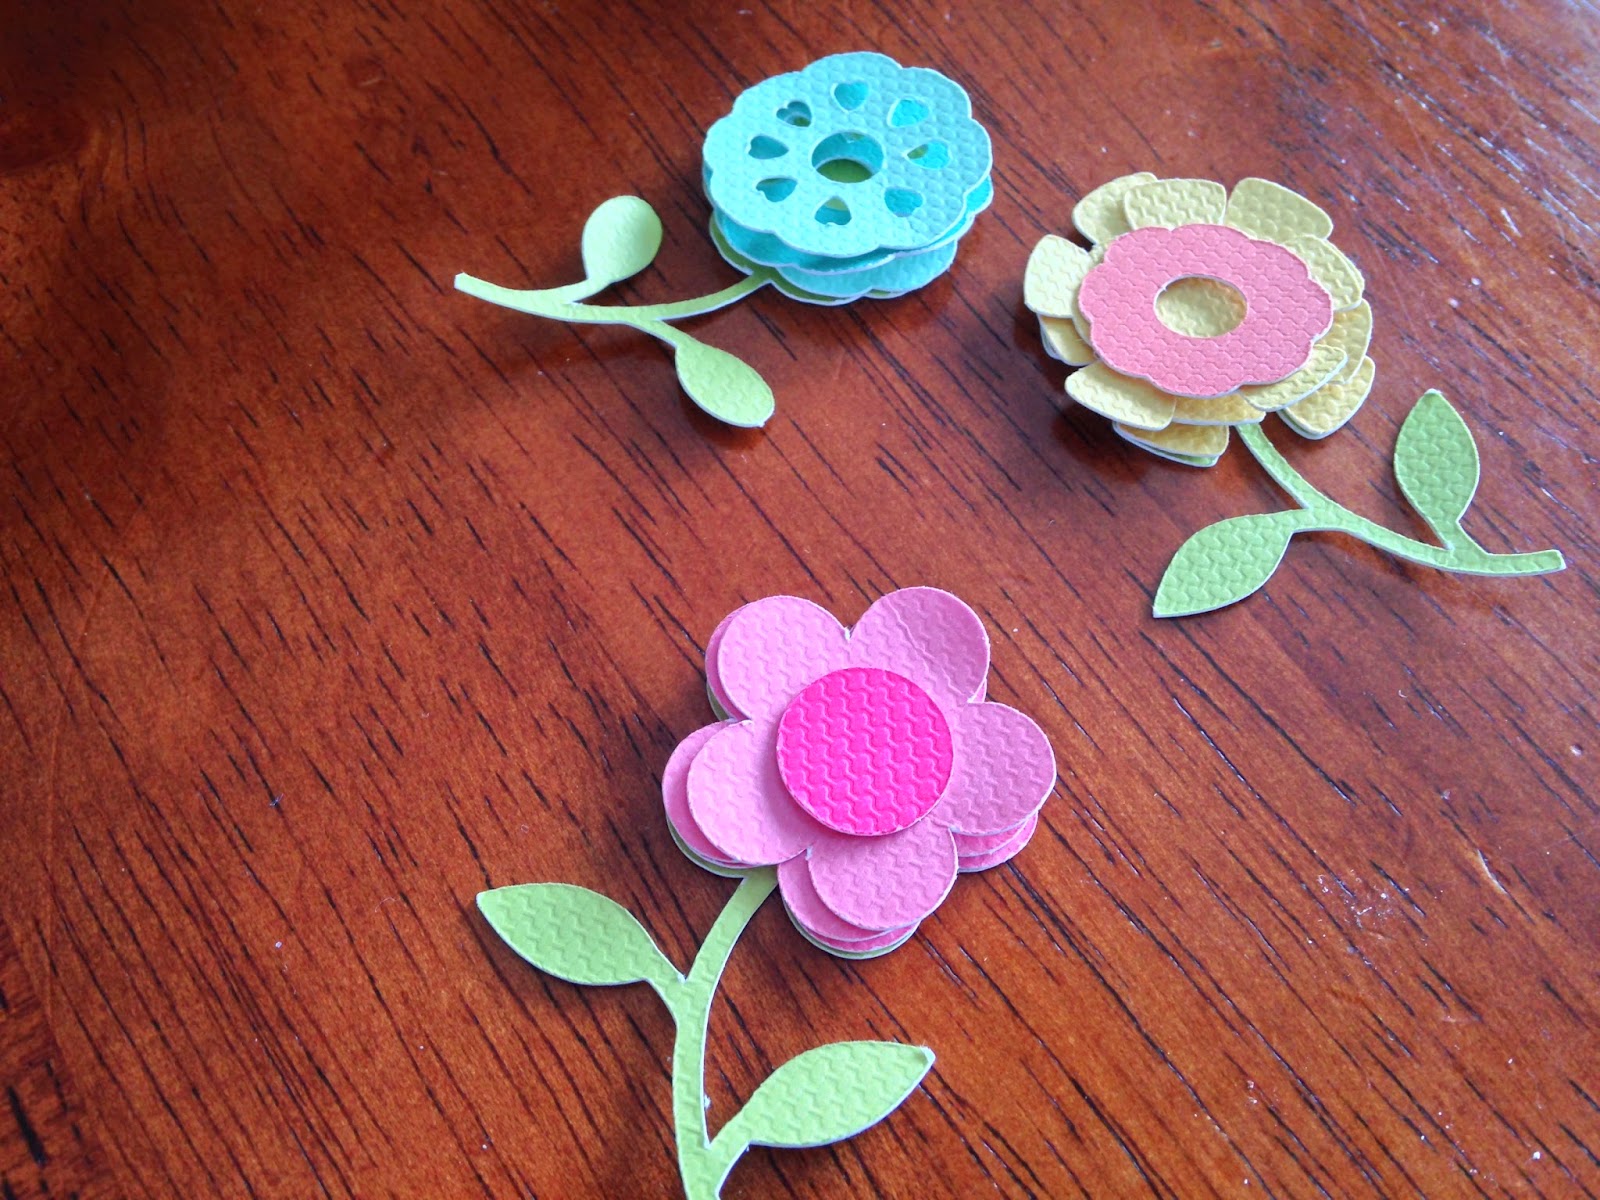
Once all the stitching was done, I took a variety of colors of We R textured card stock to cut my cute flowers.


 On a side note, I know I've said this on my blog before, but We R textured card stock is my absolute FAVORITE card stock to use with my Silhouette.  It cuts so smooth and clean.  I never have a problem with it!


Then came the fun part of deciding exactly how I wanted my flowers to look.  A simple flower garland, top and bottom, lends itself to the sampler feel, I think, and I love how the card stock gives added texture to the project.

To finish it off, I used some We R enamel dots for a few of the flower centers and the dot on the 'i' and then placed it in a fun wooden frame I painted white.  Here it is on what is the start of my crafty gallery wall.  By the way, that shutter is from We R as well.  Isn't it fabulous?  They come in several colors!


I love, love, love how this turned out.  Very simple, yet clean, fresh and girly.  Something that I'll enjoy looking at for years to come.

I hope you found some inspiration here today!  Your next stop is the very talented Patti Hamil.

If you joined our hop anywhere in the middle, here's the complete list:

We R Memory Keepershttp://wermemorykeepers.wordpress.com
Traci Penrod - http://www.artsyalbums.com
Shannon Morgan - http://designsofapaddymack.typepad.com
Jennifer McDermott - http://wonkywares.blogspot.com
Amanda Johnson - http://asjmade.blogspot.com
Aly Dosdall - http://alydosdall.blogspot.com
Pam Bray - http://www.pammejoscrapbookflair.com
Rebecca Fellows (you're here!) - http://mykitchentablestudio.blogspot.com
Patti Hamil - http://www.mypiecesoftime.blogspot.com

NOTE:  Once you have finished visiting all the blogs in our hop, don't forget to head back to the We R Memory Keepers blog and leave a comment about any of the projects you've seen today for a chance to win the awesome new Flower Punch Board!


Thank you for joining me at the Table today!


Friday, December 27, 2013

A Silhouette Chalkboard Ornament

Hello!

I hope you all had a wonderful Christmas celebration.  My family and I enjoyed lots of food, games, movies and FaceTime with our missionary daughter.  It was a wonderful day.

I thought I'd share one more Christmas post before the year is through.  I was totally inspired by a project Kimberly Crawford made for her tree.  I fell in love with it.  It takes advantage of the sketch feature on the Silhouette.


It was so fun replacing the blade with the white sketch pen and watch the magic happen.  I LOVE how these little chalkboards turned out and they add so much to my rustic Christmas tree decor.

Thanks for joining me at the Table today!

SUPPLIES USED:

PAPER:         Soft Suede – Stampin’ Up!
                        Black Textured – We R Memory Keepers

STAMPS:      Woodgrain background – Stampin’ Up!

INK:               Early Espresso – Stampin’ Up!

OTHER:        Gold Baker’s Twine – Stampin’ Up! (will be available January 1 in the Occasions Mini)
                        Die Cut Machine – Silhouette Cameo
                        White Sketch pen – Silhouette America
                        Sketch Designs (#52565, #52564, #52562, #52558, #52561, #52606, #45150)


Friday, December 13, 2013

Silhouette Home for the Holidays

Hello!

I've been playing with my new Silhouette Cameo and having a blast.  Tonight I decided to whip up some cute snowflakes out of vinyl and apply them to my front door to dress up the little windows, like this:

Outside

Inside
The snowflakes are all from different sources but the second one from the left (on the inside shot) is a We R Memory Keepers snowflake that you can find in the Silhouette Store (#38815).

Thanks for joining me at the Table today!


Tuesday, November 26, 2013

Stampin' Up!(MDS) + Silhouette = A Super Awesome Christmas Card

Hello!

You didn't think you'd be doing math today, did you? ;)

Well, never fear.  You're not going to have to put on those algebraic thinking caps.  But I did want to share a fun Christmas card with you today that combines two of my paper crafting loves….Stampin' Up! and the Silhouette cutting tool.


I am really enthralled with the negative image trend that is going on in the paper crafting world.  It's simple, yet stunning.

The deer image is from the Jolly Bingo Bits images you can buy in My Digital Studio.  I had a lot of fun when this was a stamp set.


After enlarging the image, I cut it out of Naturals Ivory card stock.   I embossed that panel with the Woodgrain embossing folder then backed it with Season of Style DSP.

Another trend I'm totally loving is gold.  I embossed the sentiment in gold embossing powder.  It gives this rustic card an elegant feel.

And of course, I couldn't leave well enough alone so I decided the deer needed stand-out Rudolph nose.  I cut the nose out of Cherry Cobbler card stock and then covered it in Cherry Cobbler Dazzling Details.

If you have My Digital Studio and a Silhouette machine, you should try this technique.  You'll be hooked!

Thanks for joining me at the Table today!


Wednesday, April 3, 2013

Happy Easter

Hello!

Yes, you read that right.  I'm still posting Easter projects.  I don't like it when Easter falls in March.  It really throws me off!

Here are a couple of quick Easter cards I made using my Silhouette and the Simply Spring collection from We R Memory Keepers.


I love LOVE the colors in this collection and I'll be using it a lot more this month so stay tuned!  For the cute little bunny tails, I clipped two roses off of the Flower Trim from Stampin' Up! and the sentiment is from a retired SU! set.  I chose to use Crumb Cake as the card base because I love how the patterned paper bunnies popped off the kraft background.  And speaking of popping off, I mounted them with dimensionals to give them extra presence.

Thanks for joining me at the Table today!


Friday, March 29, 2013

Silhouette Congratulations

Hello!

I'm here with another wedding card.  When you think of wedding cards, do you usually think fancy with gold or silver and lots of white?  I used to.  But now I create cards based on the couple's personalities (if I know them well), wedding colors (if I know that) or I take cues from their invitation.  Lately, the invitations we've received have been casual and colorful.  I love that.

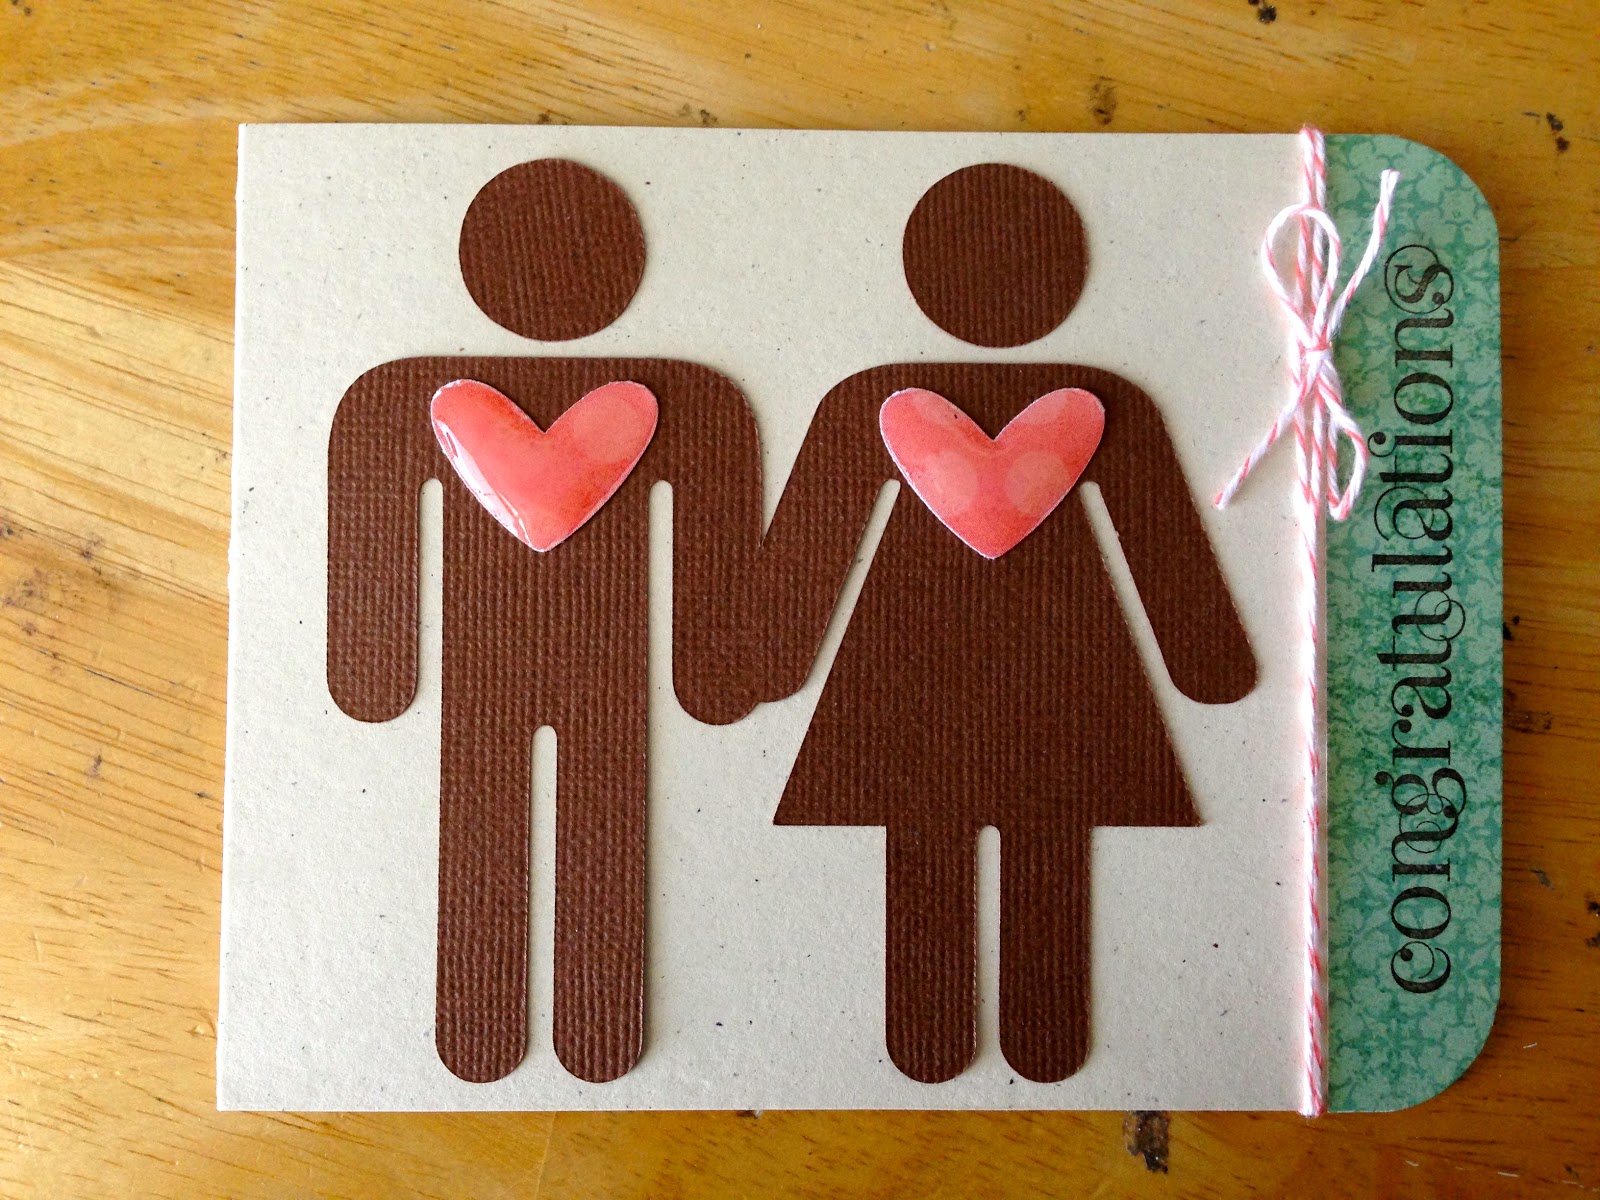
So here's my latest wedding card based on the feeling I got from the invitation.  Cute and playful.


I cut the boy and girl (I know there are crafty people out there that call them potty people, but I just can't bring myself to call them that!) with cut files on my Silhouette.  But before I cut them out, I scooted them close to each other and welded their hands together....just like a cute bride and groom would be.  I added pinkish hearts where hearts should be and covered them in Crystal Effects to make them look like epoxy accents.

Their invitation had a mix of pinks and aqua so I added a strip of aqua patterned paper and stamped the sentiment from the Curly Cute stamp set from Stampin' Up!  Then for a simple last touch, some coordinating baker's twine.

I think it turned out so cute and playful.  My challenge to you, if you don't already do it, is to take a different approach when creating wedding cards!

Thanks for joining me at the Table today!


Tuesday, March 26, 2013

My Butt Hurts....

Hello!

I've been waiting to post this because I didn't want it to go "public" till this little card reached my friend's mailbox.


This is totally a copy from a card by Julie Ebersole and when I saw her card, I wanted to make one and send it to my friend who has a great sense of humor.  But a few days later when she sent me a picture from the internet with the same type of thing, I KNEW I HAD to send it to her!

I used my Silhouette to cut the bunnies, grass, bow ties, and speech bubbles.  Card stock is from Stampin' Up! (pink and white card base), American Crafts (speech bubbles), and We R Memory Keepers (everything else).

She LOVED it!  And I'm glad.  I loved it too. :)

Thanks for joining me at the Table today!


Wednesday, February 20, 2013

Pinterest Party....A Wedding Gift

Hello!

I have a good friend getting married this week.  She and her husband-to-be are a little more established in life so they don't need a lot in the way of home goods and for her shower I didn't want to get her a gift card.  So I decided to make her something she can display in her new home.  My initial intent was to do something like this from one of my Pinterest Boards:


But then I decided I wanted a more home-themed quote and a bit more color so I ended up with this:


They're a really cute couple and I'm so happy for them.  I made the banners for their reception.  I'll take photos when we go and show you how they turned out.

Thanks for joining me at the Table today!


Friday, January 11, 2013

It's My Party and I'll Blog if I Want To!

Hello!

Well, it's been quite a while since I've checked in here and since today is my birthday, I thought I'd share a layout I finished yesterday.


I signed up for a Studio Calico/Silhouette class a few months ago.  I purchased my kit, downloaded the class Silhouette shapes and PDFs to my computer and then did nothing with it.  Then the other day, I got the bug to make something that wasn't Stampin' Up! or We R related to add to my own personal scrapbook library.  And, uh, yeah.  These photos are from 10 years ago.  I'm just getting around to scrapping them.  Oh well.  Better late than never, I guess. ;)  I love the colors and how it all came together.  I used some of the Studio Calico Silhouette shapes and papers and embellishments from My Mind's Eye.

Speaking of Stampin' Up!, three years ago today (yes, a birthday present to myself) I signed up to be a Stampin' Up! demonstrator.  Not that my business has really grown, but I've met some really wonderful people because of that decision and I like to celebrate milestones!

Thanks for joining me at the Table today!


Friday, December 7, 2012

More Christmas cards

Hello!

How about I share a couple more Christmas cards?

This first one is also based on a Pin on one of my boards.

Here's the pin photo (I've seen this photo pinned so much. Gorgeous!):


And here's my card:


The wreath is from a Close to My Heart stamp set that I got in my box of Paper Crafts Stamping Royalty goodies, the Kraft alphas are an old set from Making Memories and the stamped chevron strip down the center and the pearl are from Stampin' Up!

And here's the next card:


I love silver for Christmas so I embossed the sentiment with silver embossing powder.  The snowflake is a Silhouette shape from We R Memory Keepers.  The silver accents are Liquid Pearls from Ranger.  I love how it looks like liquid metal even when it's dry.  Simple yet classy.

Come back Monday and I'll share some fun ways to dress up your Christmas packages using the scrapbooking supplies you have in your stash!

Thanks for joining me at the Table today!

Monday, December 3, 2012

I'm Back....and boy do I have a lot to say!

Hello!

Welcome to the month of Christmas!

The older I get, the more lazy relaxed I get about the Holiday goings on.  I love to think each year will be the year that I have the magazine Christmas tree.  Usually it doesn't happen and I'm totally fine with it.  But each year (after Christmas) I get a few more ornaments in the style and color I'm going for so one year I'll get there.  And I'm sure I won't be any happier than I am already.  It doesn't have to be perfect.  We also drink lots of hot cocoa during December.  I'm drinking some right now, as a matter of fact.  With a dash of cinnamon.  Yum!  Cocoa makes everything better.  Especially when topped with whipped cream, yes?

Yes, Christmas is pretty special at our house.  I may have told you this before, but one year, Superman and the kids secretly put up and decorated the Christmas tree BEFORE Halloween!  Yeah.  I wasn't very happy about that one.  I like each holiday to have it's own celebration, people!  So it really ticks me off when Thanksgiving pretty much gets the brush-off in the retail world.  I mean like REALLY.

So anyway, now that Thanksgiving is over, I can say that I'm ready to get the Christmas season underway!

How about a simple, yet cute, neighbor gift idea?  This would also be a fun teacher gift if you're looking for ideas for that.

A year or two ago, I stumbled upon a candied almond recipe that sounded too tempting not to try.  And try I did.  With success!  It's so easy, but tastes very gourmet.

Let me tell you, if you make this (and you most definitely should), while the almonds are roasting in the oven, your kitchen will smell like Christmas at the mall!

So here's the recipe: (and don't complain to me when you gain 5 pounds in an hour because you just can't stop eating them!)


Candied Cinnamon & Sugar Almonds (makes 2 cups)
1 egg white
1 tsp cold water
1/2 tsp pure vanilla extract
2 cups unsalted whole almonds (I get the big bags at Costco)
1/2 C packed light brown sugar
1/4 tsp salt
1/2 tsp cinnamon
Preheat oven to 250 degrees. Line a large (11x17") rimmed baking sheet with foil and lightly spray with cooking spray.
In a large bowl, beat the egg white until stiff peaks form (about 4-5 minutes). Add the water and vanilla and beat again until stiff. Add the almonds to the mixture and stir gently to coat the almonds with the egg white mixture.
In a small bowl, mix the brown sugar, salt and cinnamon. Add this mixture to the almonds and stir gently to mix well.
Pour the almonds out onto the prepared baking sheet and carefully spread them out into a somewhat even layer. Place the baking sheet in the oven and bake for about an hour, stirring/flipping every 15 minutes, until the almonds look and feel dry.
To check to see if the almonds were done, I carefully picked one up in my fingers and when I pressed around it, I didn't get any wet sugar on my hands. The coating on the almonds felt hard and crunchy.
Cool completely before serving or packaging.
NOTE:  While these are super delicious the day you make them, they're even more delicious a day or two later, provided they last that long!

Now how about a card and cute packaging to go along with your delicious almonds?
The card started as a We R Memory Keepers stocking shape in the Silhouette store.  I copied and pasted the shape and made a card base out of it.  Then I cut the front out again using patterned papers from the Yuletide collection.  I embellished it with a crochet doily from the Yuletide line, Stickles, and a stamped label from Stampin' Up Itty Bitty Banners.


The packaging is just a leftover mini paint can that once housed some chipboard alphas.  I just decorated it using We R/Silhouette snowflake shapes and the Yuletide paper, plus some ribbon (you can see the lid a little better in the photo above).  I cut thin, thin strips of patterned paper, crumpled them up, and placed them in the bottom of the can. Then I placed a few of the almonds in a cellophane bag and tucked them safe and sound inside their pretty new home.


So there you have it.  A simple yet delicious gift and I tell you, if you give these this year, you'll be a favorite on everyone's list!
Check back tomorrow when I show some of the Christmas cards I've been working on lately.
Thanks for joining me at the Table today!


Tuesday, September 25, 2012

New Silhouette Downloads and a Giveaway!


Hello!

I'm enjoying a nice cool cloudy day home sick with a stomach bug today, but I couldn't wait to let you all know that We R Memory Keepers now has shapes in the Silhouette store!  Fourteen of them to be exact!  YAY!  That just makes my little heart happy!  What are the shapes, you ask?  Well right now, you can't search the Silhouette store for We R Memory Keepers.  Not sure why, but hopefully that will change in the near future so I'll just give you the exact names of the shapes and you can search for them that way.  Okee dokee?  Here goes:

WITCH (goes with the new Black Widow line)
SPIDER (Black Widow line)
CANDLES (Black Widow)
BAT (Black Widow)
SCISSORS (Love 2 Craft line)
LOVE TO CRAFT (Love 2 Craft)
I HEART CREATING  (Love 2 Craft)
I HEART SCRAPBOOKING  (Love 2 Craft)
I HEART SEWING  (Love 2 Craft)
YARN & NEEDLES  (Love 2 Craft)
PAINT & PAINTBRUSH (Love 2 Craft)
BOBBIN (Love 2 Craft)

I really, really want this to be profitable for We R so we can get more of their shapes in the store so I'm here today asking for your help and throwing in a little giveaway as an incentive to get the news out.

To be entered to win a nice collection of bits and pieces of We R's I Love 2 Craft  AND Hall Pass collections please do the following (you'll get an entry for each thing you do):

1-  Follow my blog (or tell me that you're already following)
2-  Do your own blog post letting your readers know the fabulous news (please put a link to your blog post in the comments section of this post for it to count)
3-  Purchase one of We R's Silhouette shapes and make a project with it, then put a link to your project in the comments section of this post.

Sound easy?  Good!  Now hurry up and pick up your tin can and start spreading the word!

Contest will close at midnight on Friday, September 28.  I'll announce the winner first thing Monday morning!  Good luck and thanks for your help!

Oh, and....Thanks for joining me at the Table today!

Friday, September 14, 2012

My Friend, the Teacher

Hello!

I thought I had posted this project awhile go, but I can't find it anywhere.  I guess that means I didn't.  I have a friend, who I used to work with.  We were both Para Educators (teacher's aides but more than that) with a group of wonderful women.  We all became very close.

My friend decided to become a teacher herself.  She went to school to get her degree while still working as a Para.  Well, this year, she got her first teaching job at the very same school where we all were once Paras!  I'm so proud of her.  I always loved watching her teach her little groups.  She was so good and I'm sure her new students love her.

This lady is a very no-nonsense person.  I mean she does super fun things with her students but she doesn't go for the frilly, fru-fru decorating that some teachers do.  So, I decided to make her something to hang in her classroom.  To add some homey-ness and to commemorate her first year as a full-fledged teacher.  But something that wasn't too over-the-top.

Here's what I came up with:


Simple but cute, I think.  I cut the apple with my Silhouette using the Hall Pass papers from We R Memory Keepers.  I also used my Silhouette and one of the sketch pens to "write" her name.  It was the first time I had used my sketch pens.  I picked a font that was a little "sketchy" to make it look more realistic.  It turned out exactly how I pictured it in my head.  I love when that happens!

Now I need to go visit her classroom.  I sure wish I could make myself tiny or invisible so I could sneak in and watch her at work. ;)

Thanks for joining me at the Table today!